About 2 months ago, nice folks at Adafruit offered to send us a care package filled with Raspberry Pi goodness. In return, they wanted us to create something and write about it. Most of us were busy, but it seemed like a good offer, so we quickly accepted it as we thought “Well, we will have some free time, right?” Yeah, free time…
Thus arrived our care package 4 weeks ago, addressed to yours truly as I was selected to be the person responsible with the progress. Nope, it had nothing to do with me giving classes about Raspberry Pi or being experienced with embedded Linux boards; the reason is as a grad student I have a flexible schedule, enjoy all-nighters, solder fumes and programming. We discussed many projects: GPS data logger, weather display, radiation measurement server and so on. All was nice but I wanted a couple of things to try with this project: WiFi access to a hidden network (our HackerSpace has a hidden network), using a webcam, reading sensors and displaying them. That gave me an idea to have a HackerSpace status display so that we can see if anybody is in so that people without keycards can drop by. While we are at it, why not add a webcam feed to it and a temperature&humidity sensor to see if it’s a good idea to leave home (In Tokyo, summers are really hot and humid so you usually don’t wander off the regular path between home and work). That is how HackerSpace Monitor was formed.
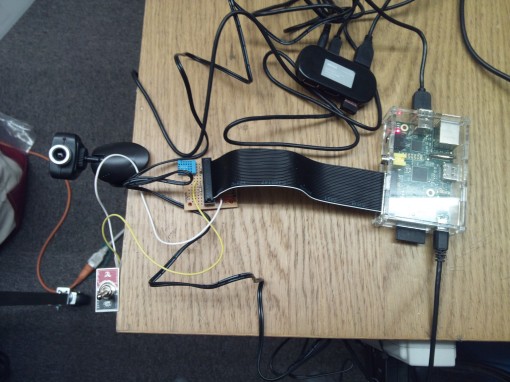
HackerSpace Monitor during development. The switch on the left side is for status messages, there is also a wireless adapter attached to the USB hub.
Read the rest of this entry »


